Plugins
How to Make Vocals Cut Through the Mix (Even Over Heavy 808s)
A vocal that sounds great on its own can disappear the moment the beat comes in. The words are there, the level meter says the vocal is loud, and yet...
Cubase comes with a deep set of stock effects, a Channel Strip on every channel and solid instruments, so a new project already has the basics of a vocal or a drum channel. Most producers still add a few third-party plugins for the jobs the stock set does not do on its own: vocal chains you can steer in plain words, real-time tuning, doubles that land on the lead, 808s built from scratch, hi-hat patterns, build-ups that finish on the bar and glue on the main bus. This guide covers the plugins worth adding to a Cubase setup, where each one sits in a project, and how to keep a short list you will actually open.
Every plugin mentioned here comes from the plugins for Cubase collection. They ship as VST3 on Mac and Windows, which is the format Cubase loads on both systems.
Cubase handles third-party plugins through the same slots as its own effects. A few details are worth knowing before you choose anything:
After installing, open the VST Plug-in Manager from the Studio menu, check that the VST3 system folder is in the list and rescan. If a plugin still does not appear, the guide on how to install VST3 and AU plugins covers the usual folders and fixes. One detail for Mac users: Cubase does not use Audio Units, so it is always the VST3 file that matters.
Vocals are where most Cubase users spend their mixing time, and where a good chain saves the most. The Channel Strip gives you a gate, compressor, EQ and saturation; these plugins cover what sits around it.
VoxShift stacks tuning, EQ, compression, saturation, doubler, delay, reverb and limiter in a single window, and ships with 409 ready-made chains for singing, rap, doubles, ad-libs and SFX. Auto Key finds the key of your vocal in about two seconds, and auto-gain keeps the output at the level of the dry vocal, so you can flip through chains without chasing the volume. On a Cubase vocal track it can replace a long row of inserts with one plugin.
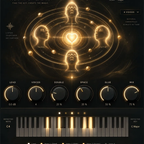
Booth is a complete vocal chain of fourteen modules in the order a studio would use them: gate, tuning, a low voice, EQ, two compressors, de-esser, air, doubler, chorus, tempo-synced delay, an octave-up halo, reverb and a safety limiter. You type what you want in plain words, such as "warmer", "hard tune" or "delay 1/8", and Booth makes the changes and lists each one, before and after.
MIXI goes one step further: you press the mic and say what you want into the same microphone you record with. Its speech recognition runs inside the plugin, offline, on Mac and Windows, and it shows every value it touched. Both are a quick way to get a vocal in shape before you fine-tune the details in the Channel Strip.
Tune Live corrects a voice toward the nearest note of the key in real time, with an engine that leaves the formants where they are. RETUNE SPEED runs from an instant robotic effect to a transparent 200 ms, and FLEX-TUNE leaves slides and blue notes alone. Because it works in real time, it suits singers who want to hear the tuning in their headphones while they record. Cubase also has its own offline pitch editing; Tune Live is the one to reach for when the effect has to be heard during the take.
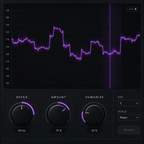
Harmony builds diatonic harmonies in the key of your song, thirds, fifths and octaves, each voice keeping the formants of the singer. Trace solves the other half of a stacked vocal: put it on the double, send the lead to its sidechain, press CAPTURE and play the section, and every word of the double lands on the timing of the lead without changing its pitch or tone. In Cubase, switch on the sidechain in the plugin header, then pick the lead track as its source.
Smooth is a dynamic resonance suppressor: it finds the narrow peaks that stick out, such as sibilance, a muddy low-mid or the proximity effect of a close mic, and cuts them only while they last. Three knobs run it, and DELTA plays only what is being removed, which makes it easy to hear whether you went too far. It sits well after the Channel Strip compressor on a bright vocal.
If you prefer to start from settings made with Cubase's own tools, the Cubase vocal presets collection covers that route, and the article on Channel Strip settings for vocals explains how they are built.
Cubase gives you Groove Agent and a solid drum editor. These plugins slot into that workflow without changing it.
For the low end, Sub Heat adds four saturation characters, from a warm triode to a metallic waveshaper, that make 808s and basses audible on small speakers. Lock measures the offset and polarity between a kick and a bass, then lines them up so both add up instead of cancelling: put it on the bass and send the kick to its sidechain. Quaver, Punch and Sub Heat also come together in the 808 Workflow bundle from the plugin bundles collection.
The Arranger track in Cubase makes it easy to move whole sections around. What it does not do is write the build-up into the next section for you. These plugins do.
The last stage of a Cubase mix usually happens on the Stereo Out or on a mix group. Two plugins help there.
Weld glues a mix or a master with one knob: pick one of six engines and turn AMOUNT. Inside, a compressor, a transient stage, a saturator, a tone shaper, a stereo stage, a clipper and a look-ahead limiter adapt to the level of the track, and CONTAIN holds the output peaks at the input peak level, so the mix gets denser without extra peak level. Aura adds air, presence and width with a chain of EQ, harmonic excitation and stereo widening tuned so the top end stays smooth, on a vocal group, a synth group or the main bus.
A long plugin list slows you down. Pick by the job you do most:
Then save what works as an FX Chain preset or a track preset, so the whole chain comes back with a single click in the next project.
Black Friday: until December 1, TuneDrip plugins and plugin bundles take an extra 20% with code BLACKFRIDAY at checkout. The Black Friday plugin guide lists what to pick by use.
Cubase's stock tools handle the basics very well. The plugins that earn a place next to them are the ones that save a step you repeat in every project: a vocal chain you can steer quickly, tuning you can hear while you record, doubles that land on the lead, 808s and hi-hats that follow the song, build-ups that finish themselves and glue on the main bus. Start with the job you do most, keep the list short, and browse the full plugins for Cubase collection when a new job comes up.