Plugins
Best Ableton Plugins for House, Techno, Vocals and Build-Ups
Ableton Live comes with a strong set of stock devices, and most producers still add a handful of third-party plugins for the jobs Live does not cover on its own:...
FL Studio ships with a deep set of stock tools, and most producers still end up adding third-party plugins for the jobs that eat the most time: tuning and mixing vocals, writing hi-hat rolls, building drops and getting the kick and the 808 to hit together. This guide walks through the plugins worth adding to an FL Studio setup for vocals, beats and mixing, how each one fits into the Mixer or the Channel Rack, and how to pick a short list instead of a folder full of tools you never open.
Every plugin mentioned here comes from the plugins for FL Studio collection. They are VST3 plugins for Mac and Windows, so they load in FL Studio on both systems.
Before choosing anything, it helps to know where each type of plugin lives in FL Studio:
After installing, open the Plugin Manager in FL Studio and run a scan so the new VST3 files appear in the plugin browser. If something does not show up, the guide on how to install VST3 and AU plugins on Mac and Windows covers the usual folders and fixes.
Vocals are where an FL Studio session usually slows down. Building a chain by hand from stock effects works, but it takes many inserts and a lot of guesswork to get a rap or a sung vocal to sit on a loud beat.
VoxShift stacks tuning, EQ, compression, saturation, doubler, delay, reverb and limiter in a single window, and comes with 409 ready-made chains for singing, rap, doubles, ad-libs and SFX. Pick a style, pick a chain, and the plugin sets the tune amount and the colour. Auto Key listens to the vocal and locks to its key in about two seconds, and auto-gain keeps the output at the level of the dry vocal, so you can flip through chains without chasing the volume. It is the quickest way to go from a raw take to a finished-sounding vocal on one Mixer insert.
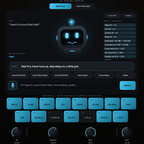
Booth is a complete vocal chain in one window: gate, tuning, EQ, two compressors, de-esser, air, doubler, chorus, tempo-synced delay, an octave-up halo, reverb and a safety limiter, fourteen modules in the order a studio would use them. MIXI goes one step further: you press the mic, say what you want to hear, and it answers in one sentence and shows every value it set. Both are useful when you know the vibe you are after but not the settings that get you there.
Tune Live corrects a voice toward the nearest note of the key in real time. Its PSOLA engine leaves the formants where they are, so the singer still sounds like the singer, from a light touch-up to the hard, stepped effect used in trap and melodic rap. Because it runs in real time, it also works while you record, which helps artists hear the tuned vocal in their headphones.
FL Studio is famous for its step sequencer and Piano roll, but writing a hi-hat roll note by note or drawing a snare build-up by hand is slow. These plugins write the pattern for you and keep it in time with the project tempo.
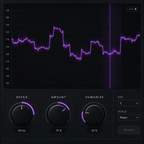
Hatch writes hi-hat patterns and plays them with its own synthesized hats. Choose Trap, Drill, House, Boom Bap or Rage, press REGENERATE until the groove clicks, then shape density, rolls in 1/32, triplets or 1/64, pitched rolls, open hats, swing and humanize. Load it in the Channel Rack and it behaves like any other instrument.
Rush plays the snare roll that builds into a drop. One note starts a roll that accelerates over 1, 2, 4 or 8 bars at the song's tempo, while velocity, pitch and filter rise with it and the reverb grows. It removes one of the most repetitive edits in a trap or EDM arrangement.
Punch is a seven-module drum enhancer on a Mixer insert: transient Punch, low-end Body, Boost, top-end Sizzle, Heat saturation, a Clip stage and a Mix control. Put it on the drum bus or on a single kick or snare when a sample sounds right solo but disappears in the full beat.
The low end decides whether a hip-hop or trap beat sounds professional on a phone, in a car and on a club system. Three tools cover most of the work.
Arrangement is where many FL Studio beats stay as eight-bar loops. Transition tools make it quicker to turn a loop into a song with clear sections.
Once the parts are in place, a beat often needs to feel like one record instead of separate sounds. Weld is the fast way to glue a mix or a master: pick one of six engines and turn AMOUNT. Inside, a compressor, a transient stage, a saturator, a tone shaper, a stereo stage, a clipper and a look-ahead limiter work together and adapt to the level of the mix. Put it on the Master insert or on a beat bus, and keep the AMOUNT moderate while you are still writing.
The plugins that improve FL Studio beats the most are the ones you open in every session. A practical approach:
If you want several of these tools at once, the plugin bundles group plugins by workflow, and the full TuneDrip plugins catalogue lists every plugin by category.
Yes. The plugins are VST3 and load in FL Studio on Mac and Windows. On a Mac they are also available as AU for other hosts.
Instruments such as Quaver or Hatch load in the Channel Rack, like any generator, and you play them from the Piano roll. Effects such as VoxShift or Weld go on a Mixer insert.
Install it, then open the Plugin Manager in FL Studio and run a scan. The plugin then shows up in the plugin browser and in the insert menus.
A vocal chain plugin saves the most time. VoxShift loads a full chain, tuning included, on one Mixer insert, and Tune Live covers real-time pitch correction while you record.
Right after checkout you receive an email with your download links and a license key. The TuneDrip Hub installs and activates the plugins on Mac and Windows.